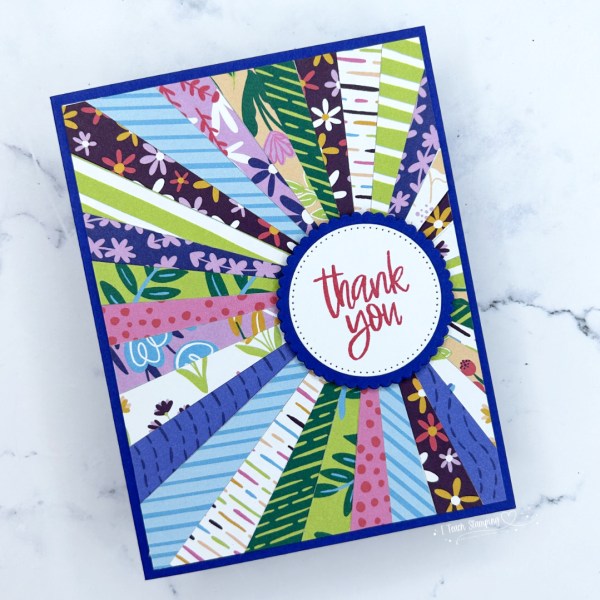
Today we are making a starburst pattern from scraps of patterned paper, and I can't wait to share with you how to do this.
I have a lot of 3/4″ scraps laying around. I have a lot of these because if you are starting with 6″ x 6″ paper and your card front size is 4″ x 5-1/4″, then you have that 3/4″ strip left over.
And today we are using them up!
I started with some 3/4″ strips that are 6″ long and some that are 4″ long. Take them each in your trimmer and cut them on a diagonal.
Then you pick a point on your white card stock and add your first point, then simply add your pieces next to each other to create this fun look.
Making a Starburst Video
To help you see how easy this comes together, check out this video here.
The Supplies
Now it's your turn to try this card! The paper I used is the host/stampin reward paper, Flowers & More. While I love this paper with this pattern and hope you try it, you can use most any paper to create a starburst.
This post may contain affiliate links, which means I may receive a small commission, at no cost to you, if you make a purchase through a link.
I no longer have product links for this company.
Whatcha Think?
Whatcha think of this idea? Are you ready to give it a try? Leave me a comment and let me know. See you in the next project! XOXO, Meg


Love it!
I love this! Thank you!
Thank you!
Really good
Thank you!
What size are the strips before you cut them in triangles?
In this video, they are 1″, but you can use any width and length.
So bright and pretty!
Thank you so much!
Awesome, happy card, it will bring a smile to the recipient and also to the person creating your special order. Thankyou
Fabulous happy card & very relaxing to create the starburst whilst using up scraps. Thankyou for the great video