Handmade Disney Birthday Cards
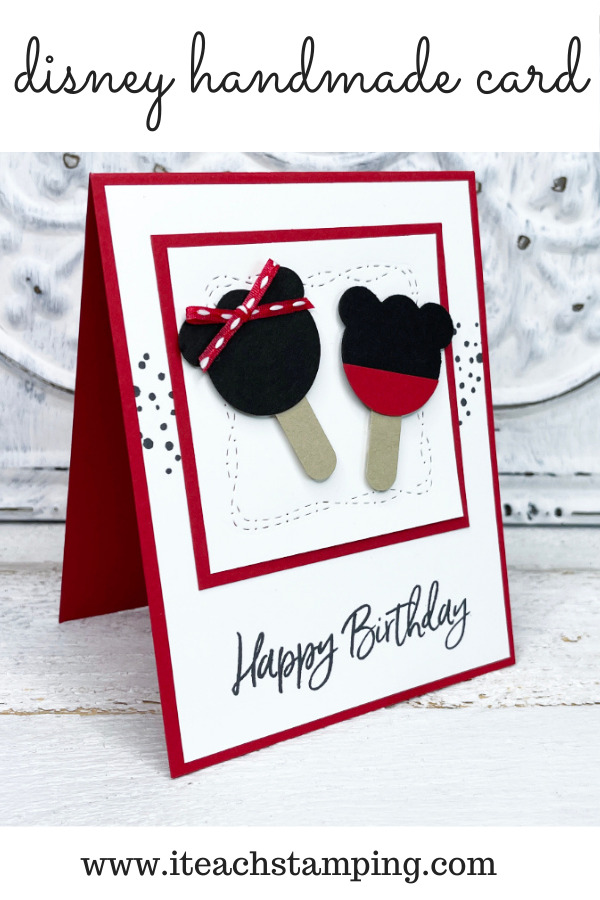
My neighbor's daughters are having a birthday and I couldn't wait to make them handmade Disney birthday cards! They LOVE Disney and all that goes with it. So some Mickey and Minnie Mouse cards are going to be a hit with them.
When we were at Disneyworld, we loved the Mickey ice cream bars – yummy! And these are inspired by those.
I am using the Sweet Ice Cream Bundle to make my handmade Disney Birthday Cards and just a handful of other supplies. Let me share this bundle with you:
Now look at the ice cream scoop and turn your head 90 degrees to the right. Do you see how that becomes a Mickey Mouse head? That's how we are making this card!!
The Supplies
Before we get further into it, let me share the list of supplies with you that you will need to make this card. Simply click on an image below to order from me.
Click here to place your order with me, use the host code below, and receive a free gift from me.
Current Host Code: MPJA4UDW
For orders over $150 placed through my store, don't use the hostess code, you will still get your free gift from me.
The Card
Now that you've seen the supplies, you have seen where the magic comes from, it's time to share the card with you.
Adorable, right? The added touches of the stamped dots behind our square layers really makes those squares POP and the stitching behind the ice cream bars really makes those pop as well. The dots and the sentiment come from the stamp set shown above.
The Making
To make these handmade Disney birthday cards, simply follow the steps below:
- Punch out two ice creams in Basic Black card stock.
- Punch out what will be the bottom half of the ice cream about 1/2″ tall of Real Red card stock. Layer this onto one of the black punched layers.
- To create your stick, either use cut down popsicle sticks or cut out two long ovals as I did from Crumb Cake card stock and secure to the back of your ice cream.
- Use the large square Whimsy Die onto Basic White that's 3″ x 3″.
- Layer onto Real Red rectangle 3-1/4″ x 3-1/4″.
- Stamp dots in black ink onto sides of Basic White rectangle 4″ x 5-1/4″
- Stamp sentiment in same ink at the bottom of this panel.
- Layer stamped piece onto your Real Red card base.
- Finish by adding ice cream bars to your card using Dimensionals and a bow tied with adorable ribbon listed in the supplies listed above.
**Note: If you struggle at all with tying bows, be sure to order a 10 Second Bow Maker here!
That's all that is to creating these handmade Disney birthday cards that are sure to delight anyone of any age – they are just too cute!
Thank You
Thank you so much for stopping by! I hope you are inspired to try these handmade Disney birthday cards that look yummy enough to eat! See you in the next project, XOXO, Meg


Love your idea! Thank you!
Oh my goodness; that is genius! I would never have thought of Mickey/ Minnie from the ice cream cone. So cute. Pinned.
We love our Mickey ice cream bars. This is absolutely adorable! Thank you!
So adorable! Those treats are one of my favorites at Disney too! I am sure the kids loved them. Thanks for sharing such adorable cards with us this week. #HomeMattersParty